3. Exporting settings to Zaraz
On this final step of the Getting starter guide, you will be guided through exporting and importing all settings from Beetle Tracking directly to Cloudflare Zaraz, so you can start collecting vital data from your website through real server-side tracking.
Watch our short video guide or scroll past it to follow the written guide below.
Export your settings in 4 easy steps
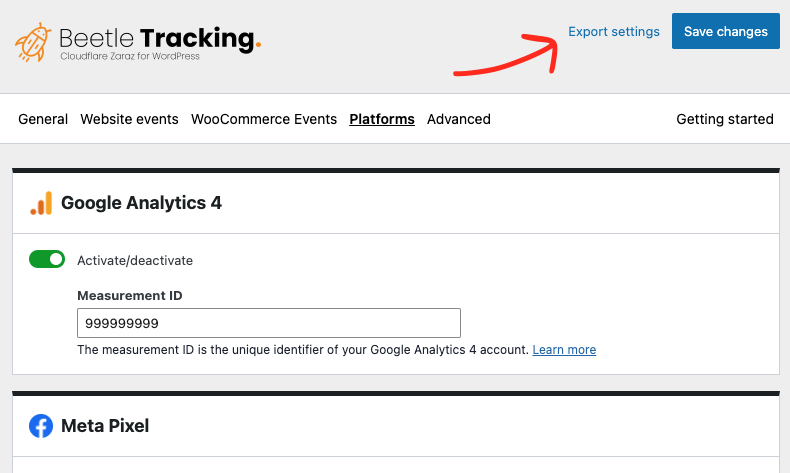
1. Go to the Platforms tab within Beetle Tracking on your website
Firstly ensure that you have activated all you’re required platforms and check that you have activated all required events under both the ‘Website events’ and ‘WooCommerce events’ tabs. If these are all in place, you’re ready to export all your settings to Cloudflare Zaraz.
- Click the ‘Export settings‘ link in top right corner, right next to the ‘Save changes‘ button.
- This download will start automatically
- When finished find your setting file (.json) in your computers download folder.

2. Login to your Cloudflare account
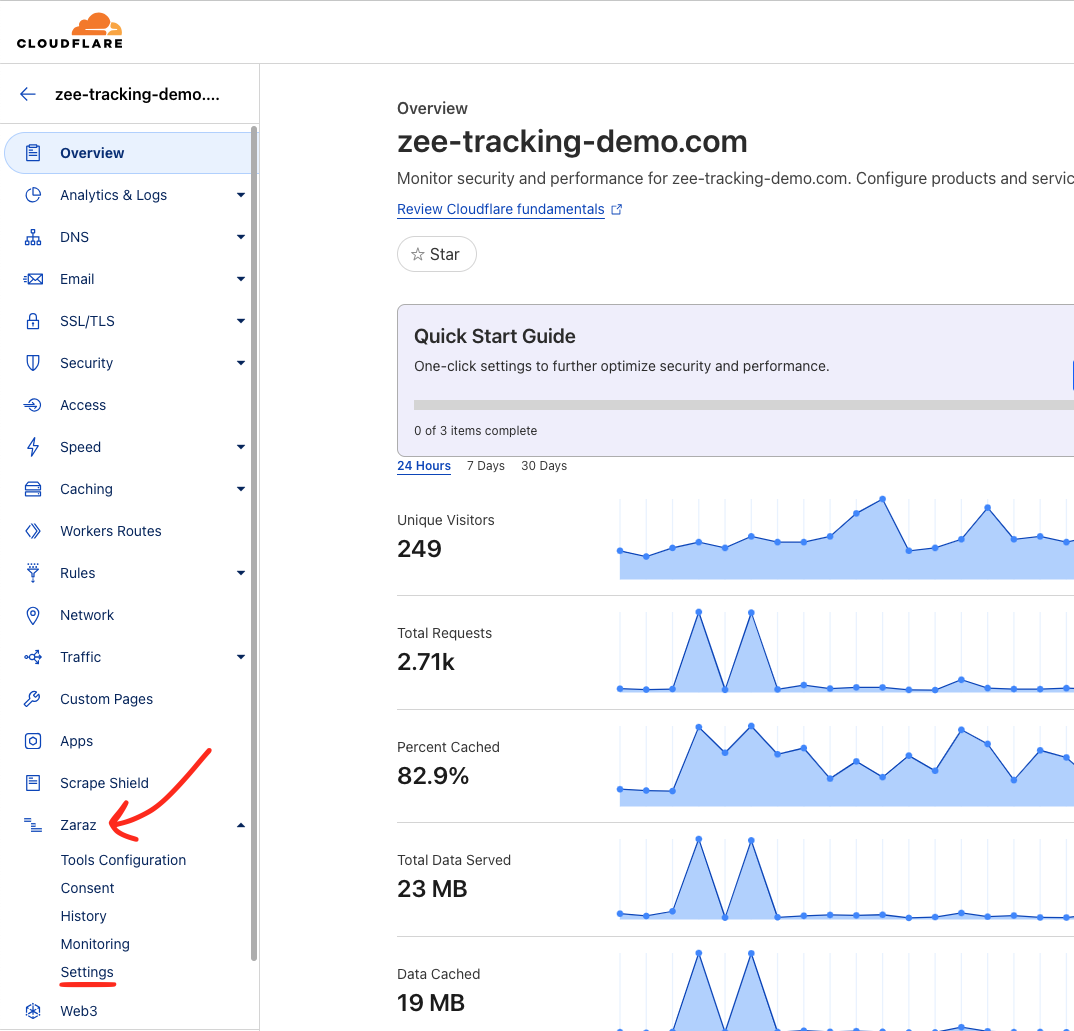
Now login to your Cloudflare account and click on your website, if you have multiple sites.
- Navigate to and click ‘Zaraz‘ in the bottom of the left sidebar on your screen
- Click on ‘Settings‘ in this dropdown
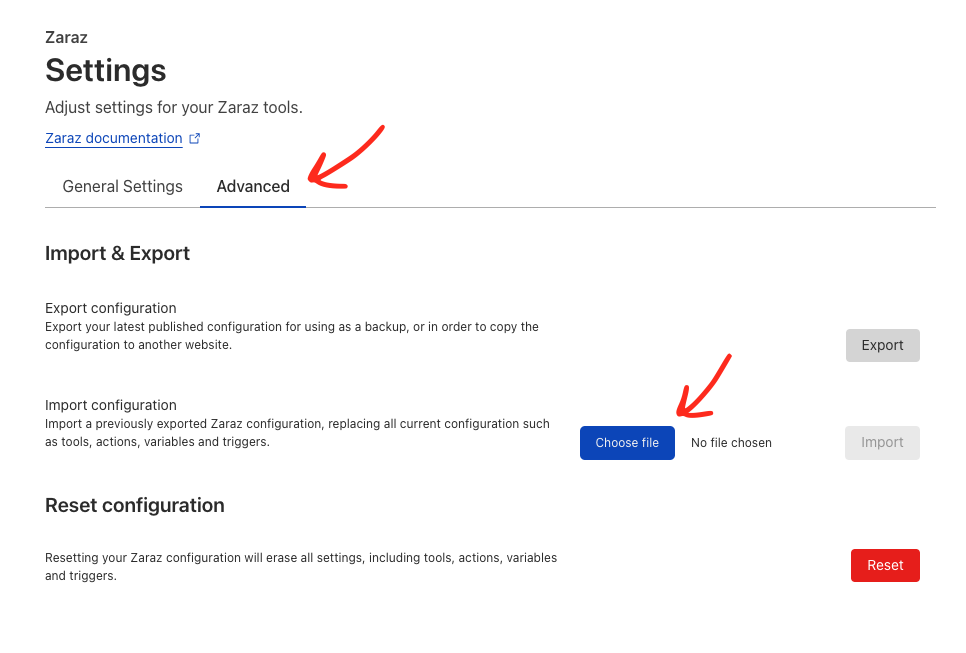
- Click the ‘Advanced‘ tab next to the General Settings tab on the settings page.

3. Backup before you import
Please be aware that you import will overwrite (delete) any existing actions, triggers and events within ‘Tools Configuration‘ under Zaraz.

So if you have anything here already, we strongly recommend that you backup these settings by preforming an ‘Export‘ before you ‘Import‘ your new settings from Beetle Tracking to you Cloudflare Zaraz account.
Simply click the ‘Export‘ button under the Export configurations section.
This will dowload a full configuration file of your Tools Configured with in Cloudflare Zaraz, this file will serve as a backup in case anything goes wrong or you decide to revert to your original settings.
Once the file is downloaded we recommend your rename this file something like: ‘Cloudflare-zaraz-backup-DD-MM-YY.json‘
4. Import your exported settings from Beetle Tracking
Once your Zaraz settings backup is in a safe place, you can now continue with you Beetle Tracking import.
To import your exported settings:
- Click on ‘Choose file‘ under the import configuration section.
- Select the setting file you previously downloaded and click ‘Open‘
- Click on the ‘Import‘ button next to Choose file
- Lastly confirm your import by clicking the red ‘Confirm‘ button in the confirmation popup.

This guide is currently being written and updated, please check in soon again for more details.
